As you will know, I found it! At the Creative Stitches, Fashion Embroidery & Hobbycrafts Show two weeks ago.
I am not an expert at sewing and I bought my first sewing machine only a couple of months ago but this is an ideal beginner project.
So let's get started!
First you need to measure your cushion pad or just check the label, mine is 18x18 inches. I bought the Simply Microfibre Cushion Pad from Dunelm-mill for £2.99. What a fantastic price for this size, it is good quality, very soft and plump.
I like to give my fabric a good iron before cutting, to remove an creases or folds. Then measure out your pieces first using chalk, this is to ensure you have enough fabric and that any images or designs will end up where you want them to once the cushion is made.
Front - cut the fabric 1 inch bigger than the pad all the way round, so for my cushion I cut a 19x19 piece.
For the back cut 2 smaller pieces which will overlap by about 5 inches to create the envelope.
Back (1) - cut the fabric the same length but shorten the width, so 19x14
Back (2) - cut the fabric the same length again but shorten the width a little more, so 19x13
The pieces may need another iron once cut out. With your two back pieces we want to create a seam along one length of the fabric. These will be the exposed edges where you insert the cushion pad. Using your iron folder over 1/2 inch of fabric and iron flat and then fold it over another 1/2 inch and press to create a clean seam. Pin in place for more stability when sewing.
Now go over to sewing machine and using a straight stitch sew the seams down, close to the folded edge on both of your back pieces. I like to back stitch at the beginning and end to secure the stitch.
They should look like this -->
They should look like this -->
You could also add a trimming or do two rows of stitching to create a more finished look.
Once the seams are complete lay your front piece right side facing up and then place your 2 back pieces right side's facing down one on top of the other, with the seams you have just created overlapping in the middle. Line the pieces up neatly and pin all the way around to secure the fabric in place ready to sew the cover inside out.
Again using a straight stitch sew all the way around, with about a 1/2 inch allowance. Remember to take the pins out as you go, we don't want any broken needles. It is also a good idea to back stitch the envelope opening to help reinforce it, as you will be pulling on this to insert and remove the cushion pad. When you get to the corners ensure that the needle is down and raise the presser foot, rotate the fabric 90 degrees and lower the presser foot then continue with your straight stitch.
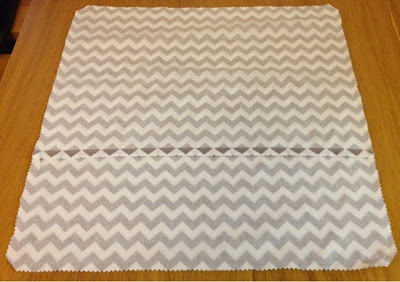
Now using a zig zag stitch go all the way around again, this will help reduce fraying especially when washing. However, I was a little lazy and decided to use pinking shears which work in a similar way and limit the length of the frayed thread. As you can see you will also need to cut diagonally across the corners, this will remove the excess fabric to create a more defined point when the cover is turned right side out.

Insert the cushion pad and there you have it, an easy envelope cushion cover!
These would be great gifts or a nice way to personalise your home. You should also check out these shirt and t.shirt cushion covers on Pinterest, some fab ideas for recycling old clothes.
Let me know if you give this project a go and send me your pictures!


Post a Comment